

Create a Project
How to create and onboard a project onto IronSled — the AI-assisted flow for Code/Build projects, the simple form for Upload projects, platform review, automated provisioning, and activation.
Project onboarding is the process of bringing a new application or service onto the IronSled platform. There are two project types, each with its own onboarding method, but both follow the same lifecycle — Submitted → Reviewing → Implementing → Available — and both end with the same goal: a project at Available status, with an Okta access group, a GitLab group with SAML integration, and its repositories created and ready.
- Code / Build onboarding uses an AI-assisted conversation to plan repositories and configuration.
- Upload onboarding uses a short manual form, because there is no source code or build architecture to plan.
External vendors don't create their own projects. If you're an external user, your project is created and onboarded for you by an IronSled program manager — the project-creation option is restricted to internal teams and won't appear for you. This page describes onboarding for internal teams; as an external vendor, see Upload Projects for the workflow you'll use once your project exists.
Choosing a Project Type
Onboarding begins by choosing a project type with the toggle at the top of the onboarding screen. The choice determines how the project is provisioned and which workflow you use.
| Type | Who it's for | What it provides |
|---|---|---|
| Code / Build | Internal teams building software on the platform | The full project experience — source repositories, CI/CD pipelines, container registry, environments, compliance, and tickets. |
| Upload | External teams bringing prebuilt container images | A workspace for bringing prebuilt container images in for scanning and publishing — no source code or build pipeline. |
In the project list, each project card is marked with its type — a Code indicator (code-branch icon) or an Upload indicator (cloud icon) — next to its status.
Choose an Upload project when a team already has built container images (delivered as Docker image tarballs) rather than source code, does not need the platform's build pipeline, or works in an air-gapped environment where images are moved as files. The goal for an upload project is to accept each container image, scan it, and publish the result to the internal registry — without the team operating a build pipeline.
Code / Build Onboarding
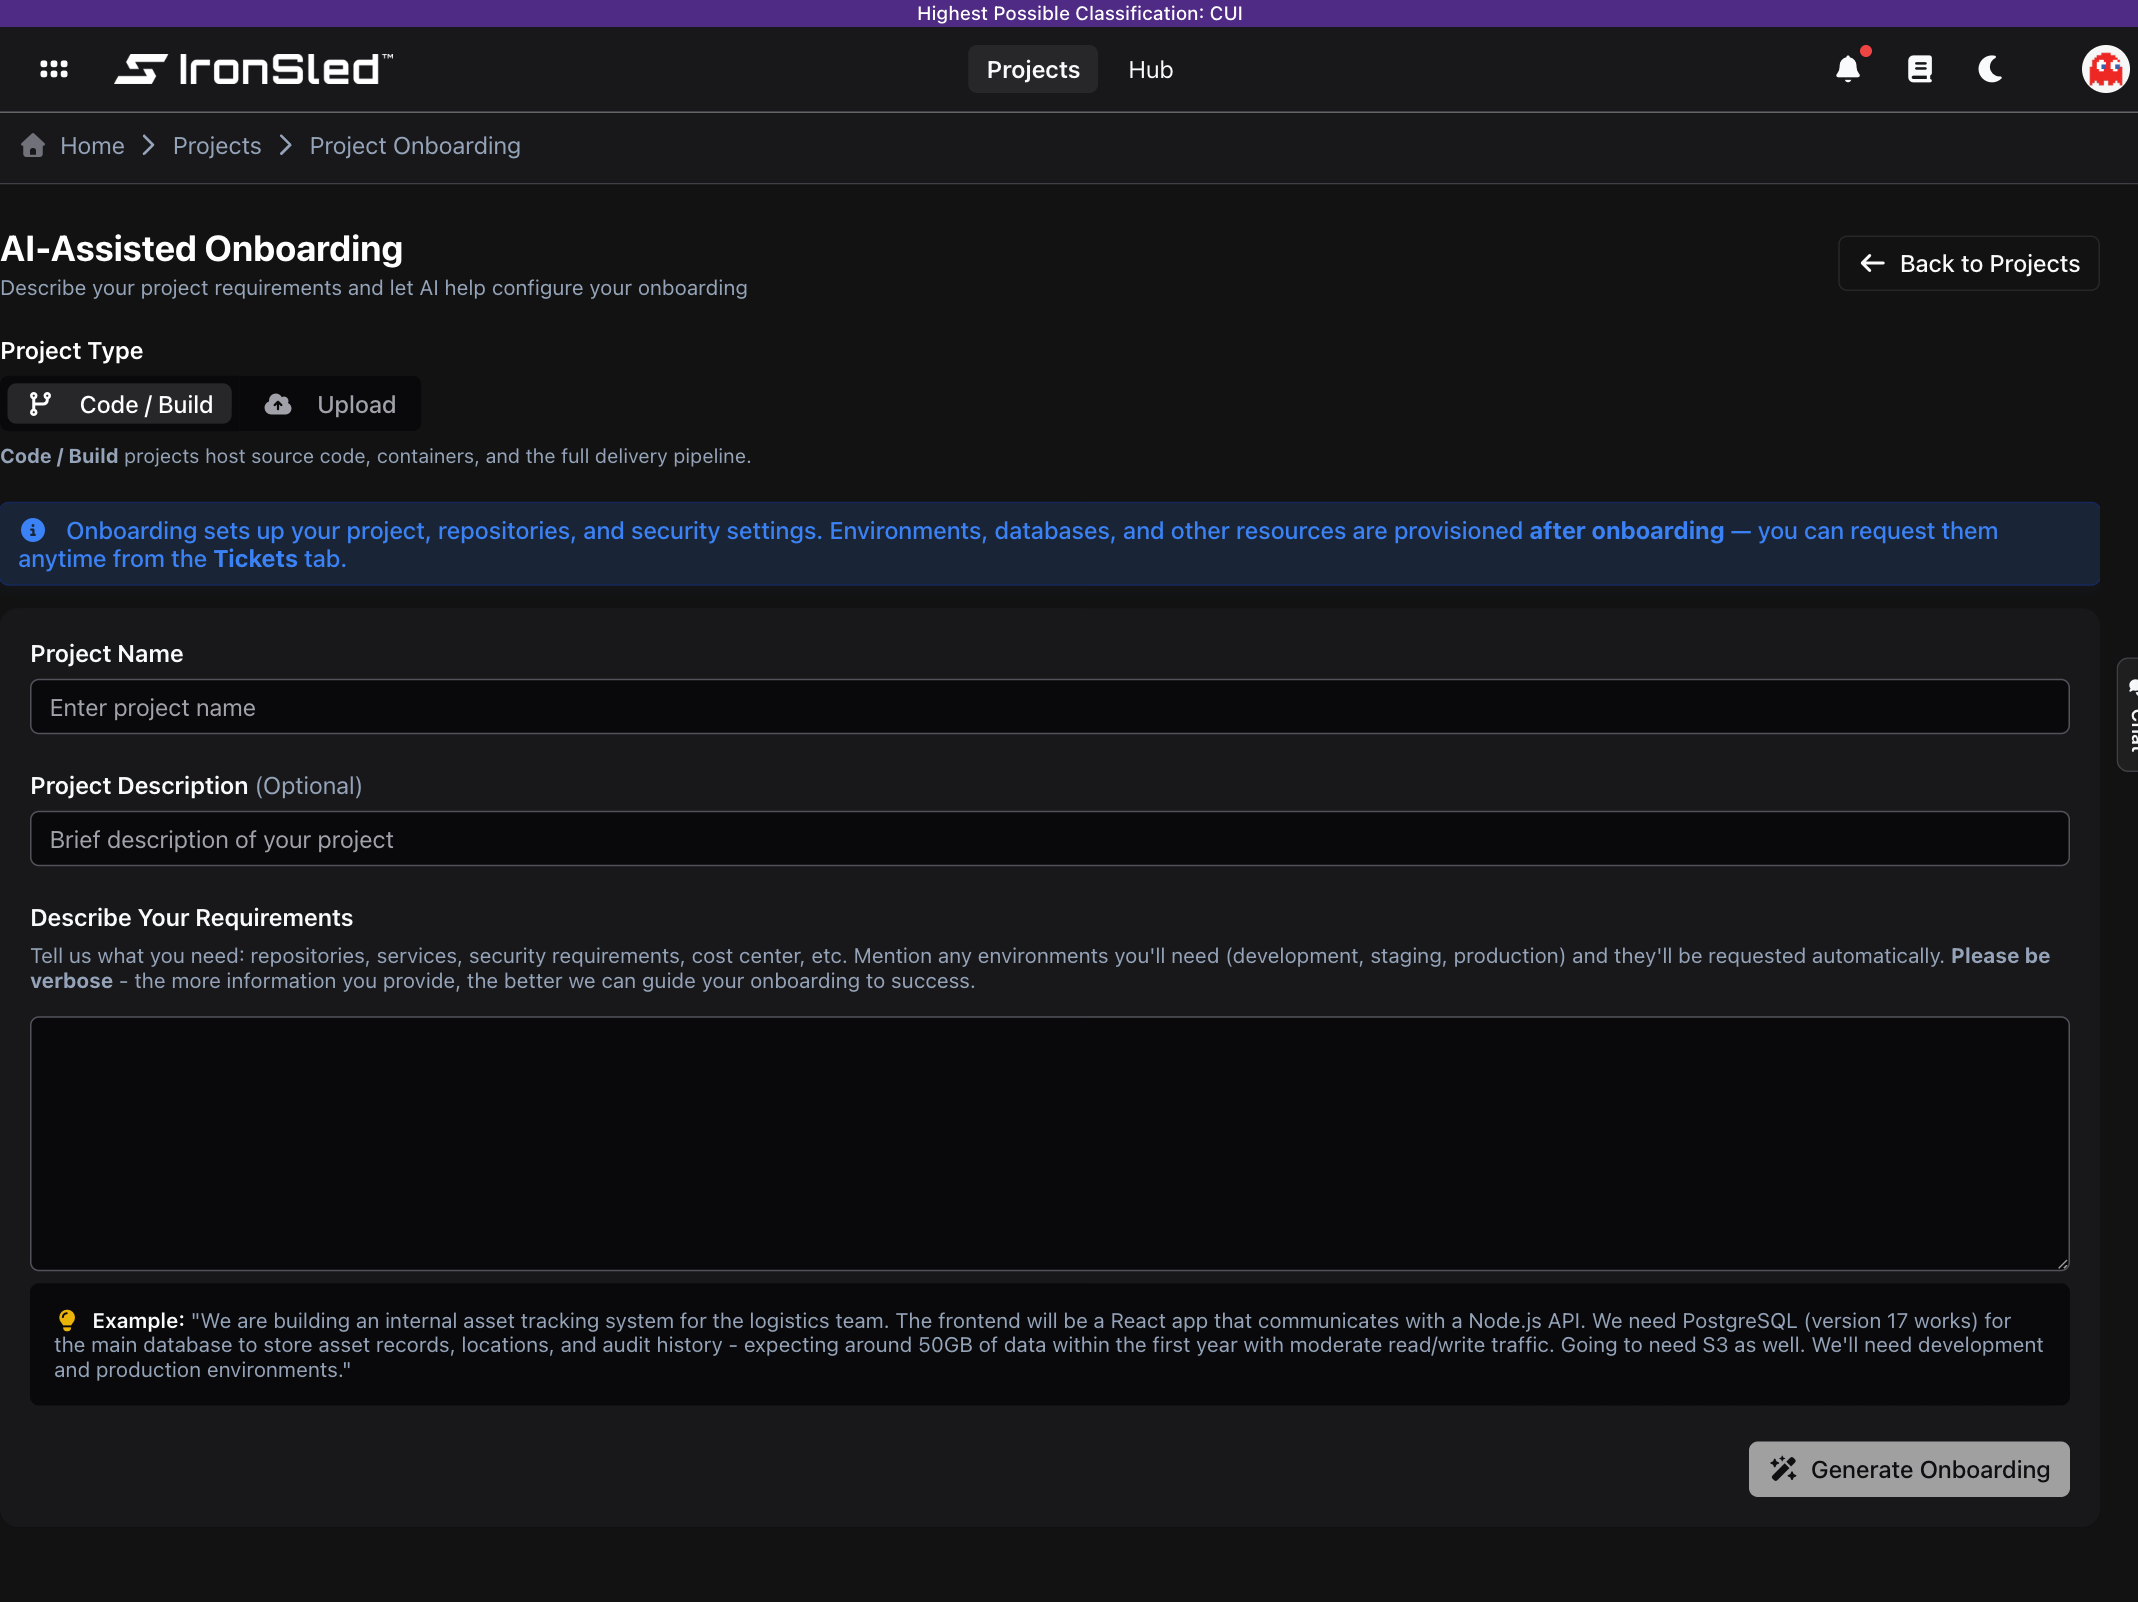
Code / Build onboarding is an AI-assisted conversation that plans the project's repositories and configuration before submitting it for review.
Why Onboard Through IronSled
Teams that onboard a Code / Build project get more than a place to store code. Every repository on the platform's managed GitLab instance automatically benefits from:
- Pre-built DevSecOps pipelines — Automated build, scan, sign, and deploy stages that run on every commit.
- Integrated security scanning — Trivy, Grype, SonarQube, and Veracode scan every build with no pipeline configuration from the team.
- Secure base images — Chainguard Wolfi-based images rebuilt nightly with zero known vulnerabilities.
- Supply chain security — Cosign image signing and SBOM generation on every build.
- Centralized management — Team permissions, vulnerability tracking, and tickets in one place.
The AI-Assisted Flow
- Describe the project — From the project list, click Project Onboarding. The AI onboarding assistant presents a form with Project Name, Project Description, and Requirements (a natural-language description of the project's needs). The more context about the application type and technology stack, the better the AI can recommend a repository structure.
- AI-generated configuration — The assistant analyzes the requirements and generates a configuration covering project basics (name, description, cost center), recommended repositories, and deployment interest (whether the team anticipates needing environments — captured as metadata, not created immediately). If the input is too vague, the AI explains what more it needs rather than generating an incomplete configuration.
- Follow-up questions — If more information is needed, the AI presents categorized follow-up questions (project identity, repository structure, future deployment), each marked required or optional. The conversation can iterate over multiple rounds.
- Review and refine — When the configuration is complete, the team reviews project basics, repositories, and deployment interest, and can give feedback (rename a repository, adjust deployment interest, etc.). The AI updates the configuration accordingly.
- Submit for review — The team confirms they have reviewed the configuration and clicks Create Project. The project is created with status Submitted and reviewers are notified. A cost center is required before submitting a Code / Build project.
Upload Onboarding
Upload projects are created through the same onboarding entry point — the Project Type toggle at the top of the onboarding screen selects Upload.
Upload onboarding is intentionally simple, because there is no source code or build architecture to plan, so there is no AI-assisted configuration. The team fills in a short form:
- Project Name — The name of the application.
- Project Description — A brief summary of what the application is.
- Cost Center — The organizational cost center for the project.
- Anything else we should know? (optional) — Points of contact, expected image sources, timelines, or anything else useful to the platform team.
Two things differ from Code / Build onboarding: there is no AI-generated configuration, and the CUI question is not asked (upload projects are not collected as CUI during onboarding). When submitted, an upload project enters the same review queue as a code project.
External vendors are onboarded as Upload projects by an IronSled program manager on the vendor's behalf — external users do not create or submit their own projects.
Platform Team Review
Once submitted, the onboarding request — for either project type — moves to the platform team for review. Platform managers review the submitted configuration through the Platform Team Console and either approve the request or reject it with notes explaining what needs to change. If rejected, the team is notified and can revise and resubmit.
Automated Provisioning
When a request is approved, the project moves to Implementing status and IronSled's automation provisions it. Access provisioning is the same for both project types; the repositories differ.
For both project types:
- Okta group creation — Okta groups are created for each access level using the deployment's configured group prefix combined with the project's path (e.g.,
{prefix}-apps-{project-path}-owners,{prefix}-apps-{project-path}-developers). The prefix is set per environment on the active Okta integration. Members are assigned to groups by project role. - GitLab group creation — A GitLab group is created under the platform's parent organization, with SAML group links mapping Okta groups to GitLab permissions.
- Member synchronization — Team members are added to the corresponding Okta and GitLab groups at their assigned permission level.
Repositories differ by type:
- Code / Build — The Git repositories defined in the onboarding configuration are created within the project's GitLab group, pre-configured with branch protection and CI/CD pipeline integration.
- Upload — A
container_uploadsrepository is created (where uploaded images and their scan artifacts are organized) along with a Helm chart repository the team populates with their own Helm chart and README. There are no source-code repositories, since the team brings prebuilt images.
Each setup task tracks its own status — pending, in progress, complete, or failed — visible on the project's onboarding timeline.
Project Activation
When all setup tasks complete, the project status changes to Available and team members are notified that onboarding is complete.
- Code / Build projects — GitLab repositories are ready for commits with the DevSecOps pipeline active on every push; Okta groups are provisioned; security scanning starts automatically on the first pipeline run. When ready to deploy, the team requests environments through the project's environment features.
- Upload projects — The team can add container-upload repositories under Repositories — each one appears as a container — and upload images to them under Containers. Uploaded images (
.tar,.tar.gz, or.tgz) are scanned and published to the registry automatically. See Containers for the upload and scan workflow.
Onboarding Progress Tracking
Throughout onboarding, the project detail page shows an onboarding progress timeline with:
- The current status of the project (Submitted, Reviewing, Implementing, Available, or Rejected).
- A history of status changes with timestamps, the user who made each change, and any notes.
- During the Implementing phase, a detailed view of setup tasks with their individual statuses.
- A View Full Submission option that opens the complete onboarding configuration.
Continuing an Onboarding
If a team starts onboarding but does not complete it, the project is saved with an Onboarding status. The team can return to the project from their project list and resume where they left off — for a code project, continuing the AI conversation — without losing previously provided information.
Overview
How projects work in IronSled — the project lifecycle, the Project Scorecard and its KPIs, and the sections of a project (Team, Repositories, Containers, Environments, Tickets, Reports & Artifacts, and Settings).
Upload Projects
The complete Upload-project workflow in IronSled — choosing the Upload project type during onboarding, what gets provisioned, adding a container-upload repository, preparing a Docker image (docker save), uploading the image tar in the UI, and how images are scanned, published, and tracked by status.